In professional filmmaking, the performance of a camera setup depends not only on the quality of the camera and accessories but also on the efficiency of its cable management. Many filmmakers focus on lenses, stabilizers, cages, and monitors, but cable routing is equally important. A clean and organized cable system ensures reliable performance, prevents technical issues, improves stabilization and balance, and helps creators avoid frustrating interruptions during shoots. Whether you’re a videographer, YouTuber, studio photographer, or filmmaker, mastering cable management can significantly elevate the professionalism and stability of your camera rig.
- Why Cable Management Matters in Professional Camera Rigs
- Types of Camera Rigs and How Cables Fit Into Each Setup
- Essential Components of a Professional Camera Rig Setup Kit
- Understanding Camera Rig Cages and Their Role in Cable Management
- Cable Management Tools for Professional Camera Rigs
- Building Your Camera Rig: A Step-by-Step Guide
- Buying Guide: How to Choose a Cable Management System for Your Rig
- Common Cable Management Mistakes and How to Avoid Them
- Practical Cable Management Tips for Every Shooting Scenario
- FAQ: Cable Management for Camera Rigs
Why Cable Management Matters in Professional Camera Rigs
Cable management plays a critical role in the overall workflow and safety of a production set. Poorly organized cables can create unnecessary tension on ports, leading to loose connections or physical damage. Cables that dangle freely can disrupt stabilization systems or get caught when repositioning the camera. Improper routing also introduces the risk of accidental unplugging during important shots, while visually messy rigs can leave a negative impression on clients. Thoughtful cable management eliminates these challenges and ensures a smoother shooting experience. It keeps the rig easy to balance, more reliable, and visually clean throughout the shoot.
Types of Camera Rigs and How Cables Fit Into Each Setup
Different camera rigs come with unique cable management challenges, and understanding these differences helps you organize your setup more effectively.
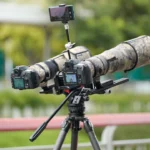
Handheld rigs, for example, are designed for mobility, which means cables must be routed in a way that doesn’t restrict movement. Shorter, lightweight cables that follow the contour of the cage or handle work best for handheld shooting. Shoulder rigs, on the other hand, require a more balanced approach. Cables should be routed backward toward the battery plate or shoulder mount so they don’t interfere with the operator’s movements or shift the weight distribution.
Stabilizer rigs, such as gimbals, are the most sensitive to cable tension. Even a slight pull can cause the motors to compensate incorrectly, resulting in shaky footage. For this reason, stabilizers require extremely flexible cables and careful routing that allows free rotation without obstruction. Car-mounted rigs experience strong vibrations, constant movement, and external forces such as wind, making them more demanding in terms of cable security. Locking connectors and reinforced clamps are necessary to keep cables from detaching or shaking loose during motion.
Essential Components of a Professional Camera Rig Setup Kit
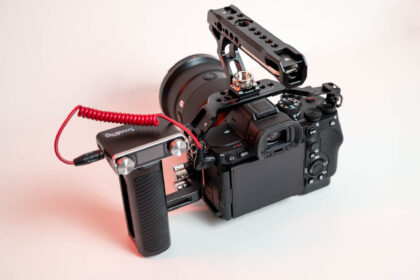
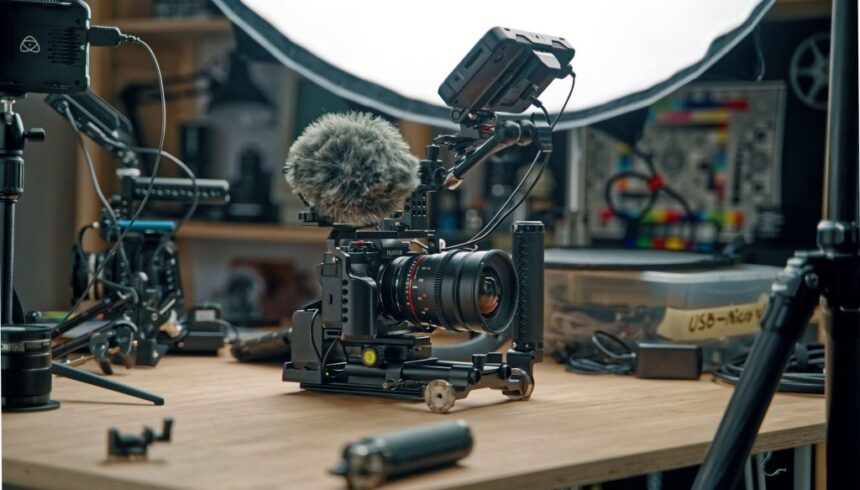
A well-designed camera rig setup kit includes essential components that improve cable routing and overall system reliability. Cable clamps help secure cables to the frame and prevent them from moving unexpectedly. Routing sleeves, often made of nylon or neoprene, keep multiple cables bundled neatly together. Locking cables, especially for HDMI and SDI connections, are extremely useful for handheld or high-motion shooting where standard connectors can easily loosen.
Velcro cable ties remain a favorite among professionals because they are reusable, easy to remove, and gentle on delicate cables. Power distribution systems also play an important role, helping reduce the number of long cables running from various devices. A camera rig cage provides structured mounting points, turning the camera body into a more robust and organized system that supports consistent cable management.
Understanding Camera Rig Cages and Their Role in Cable Management
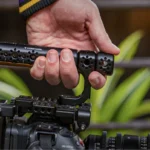
Camera rig cages serve as the backbone of sophisticated cable management. With multiple mounting points, rails, and threaded holes, cages offer dedicated areas to attach accessories such as monitors, microphones, wireless transmitters, and battery plates. This structured layout keeps cables from hanging loosely and reduces the risk of straining fragile camera ports.
A cage also creates natural routes along its handles and rails, allowing cables to follow clean lines instead of crossing awkwardly over the camera body. When used properly, a cage helps create a more balanced, professional, and organized rig. Filmmakers often attach Velcro ties to side handles, use cable clamps near sensitive ports, and rely on coiled cables to accommodate limited movement areas without creating excess slack.
Cable Management Tools for Professional Camera Rigs
Professional cable management relies on tools that ensure stability and safety. Cable clamps are essential for preventing cables from shifting or applying stress to the ports. Locking cables are preferred when using stabilizers or car rigs, where vibrations can cause standard cables to loosen. Coiled cables offer natural flexibility and prevent tension during pans or tilts, especially when using gimbals. Velcro straps simplify cable routing by allowing quick adjustments without damaging the wires. Adhesive cable guides are particularly useful for car rigs or fixed setups, ensuring every cable remains secure even in high-impact environments.
Building Your Camera Rig: A Step-by-Step Guide
Building a camera rig with strong cable management starts with planning the layout. Before attaching any cables, you should decide where each accessory will sit, including the monitor, microphone, follow-focus system, wireless modules, and battery plate. Planning helps minimize unnecessary cable length and reduces clutter.
Power cables should always be routed first, as they tend to be bulkier. A central power distribution unit can help reduce the number of long wires stretching across the rig. Once the power system is established, video and audio cables can be added carefully. These are usually more fragile and should be attached with strain-relief clamps to avoid damaging ports.
After connecting all necessary cables, securing them with ties and clamps is the next step. Cables should be tied consistently and never overly tightened. Once everything is secured, the rig should be tested for full mobility. Pan, tilt, and rotation tests reveal whether any cable pulls or interferes with movement. This final step ensures the rig performs reliably in real shooting conditions.
Buying Guide: How to Choose a Cable Management System for Your Rig
Choosing the right cable management system depends on the type of rig you use. Stabilizer rigs require lightweight, flexible cables, while studio rigs benefit from longer, more durable wires. Car rigs demand vibration-resistant clamps and locking connectors to withstand movement. Durability should always be a priority, and materials like reinforced connectors, braided cables, and metal clamps are far more reliable than cheaper alternatives.
Compatibility also matters. The cable system should work well with your cage, rails, top plate, and accessory arms. Investing in high-quality cable management tools saves time, reduces shooting interruptions, and protects expensive equipment from avoidable damage.
Common Cable Management Mistakes and How to Avoid Them
Many filmmakers unintentionally make mistakes that compromise their rig. Using excessively long cables creates unnecessary loops that can snag during movement. Tightening cable ties too much can damage the internal wiring or pull on the connector. Routing cables across motors on a stabilizer creates interference, and mixing power and signal cables can introduce noise. Another common issue is blocking vents or covering heat-sensitive areas with cables, which can cause overheating. Avoiding these mistakes helps maintain a cleaner, safer, and more functional rig.
Practical Cable Management Tips for Every Shooting Scenario
Different environments require different cable management strategies. In studio settings, you may need longer cables that stretch across larger spaces, but they should be taped down or routed safely to avoid tripping hazards. Outdoor and run-and-gun shooting benefit from shorter, lighter cables that enhance mobility. For high-vibration scenarios such as car or motorcycle rigs, additional reinforcement through clamps, tape, and locking connectors is essential to prevent cables from detaching during intense movement.
For filmmakers looking to upgrade their camera rigs with high-quality mounts and accessories, visiting CameraHolder.com provides access to reliable tools that support advanced rig setups. You can explore more
FAQ: Cable Management for Camera Rigs
What is the best cable management system for camera rigs?
The best systems include secure cable clamps, locking cables, coiled connectors, and reliable routing methods that protect ports and prevent accidental disconnections.
How do professionals organize cables on a rig?
Professionals route cables along the rig’s cage or rails, separate power and signal lines, and use Velcro ties and clamps to keep everything secure without restricting movement.
Do camera rig cages help with cable management?
Yes, camera rig cages offer structured mounting points that support cleaner cable routing and reduce strain on ports.
What cables are essential for a professional film rig?
Common cables include SDI and HDMI for video output, D-Tap cables for power distribution, USB-C for control functions, and XLR cables for audio connections.
How do you prevent cables from pulling during handheld shots?
Using shorter cables, securing them properly to the cage, and ensuring proper strain relief helps prevent accidental pulls during handheld filming.